Did you know, that the average person visits the watering closet about 2500 times a year? With that much foot traffic, it is no wonder toilets malfunction from time to time. Plumbing issues are intimidating —as we scarcely encounter them— in this post, we will outline the general steps to follow if you find yourself with a leaky toilet.
Prepare the Work Area and Supplies
Before you begin work in the bathroom, clean the area thoroughly. Exposure to raw sewage can cause serious and debilitating illnesses. Keep any pets or small children away from the area and ready supplies beforehand to avoid tracking contaminated water to other areas of the house. If you have carpet in the bathroom, think about contacting professional cleaners as getting all the water out is difficult. Turn off the water at the supply valve to prevent further leaks until you have identified the source of the spill. Check here for a clear picture of a toilet’s construction.
Recommended Cleaning Supplies:
- Gloves
- Waterproof shoes/ Rain boots
- Mop/ Cleaning rags
- Bucket
- Disinfectant
- Bags for Disposal
- Protective Eyewear
- Face masks
Identify the Source
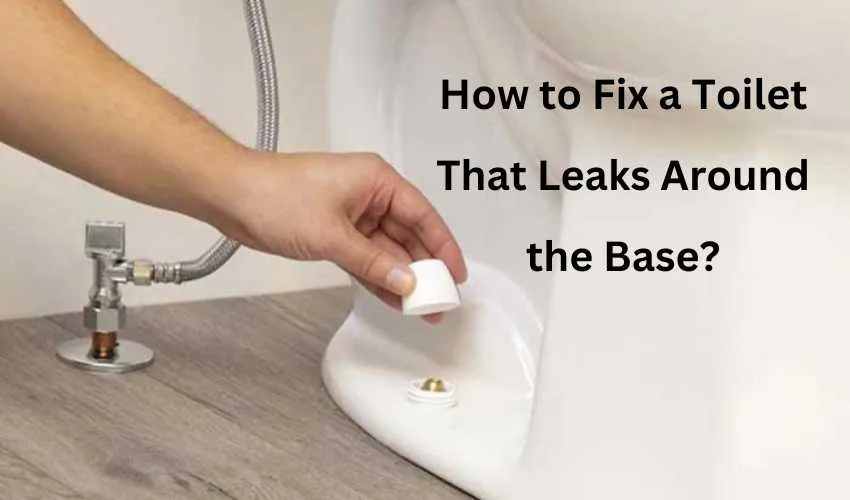
Inspect your toilet and find the leak’s origin. Are there cracks in the surface, sweat on the tank or, does the supply line seem loose? If you are unsure, flush the toilet. Even though the supply line is off, the toilet will flush as long as the tank is full. Watch to see if the basin leaks where it connects to the waterline or is liquid seeps from the base of the toilet. The main causes of a leaky toilet base include condensation on the toilet bowl, loose tee bolts, or a damaged/broken wax seal. The next few sections will address solutions to each of these problems.
Condense on Condensation
Condensation happens when water vapor changes from its gaseous state to its liquid form. This generally happens in areas with an excess of humidity, making bathrooms a perfect environment for this transformation (especially during the winter months.) Precipitation on your toilet means that it is holding water that is cold enough to drop its surface temperature enough to condense vapor into water. So, what could be causing this to happen and how do I fix it? Remedying excess perspiration by installing a drip tray, anti-condensation kit, an anti-sweat valve, or replacing a faulty flapper.
The flapper of the toilet is just as it sounds. It is a little piece inside the tank that lifts to allow water into the fill area after the toilet is flushed. A worn or broken flapper results in the tank constantly pulling in new water and a drop in the overall temperature.
Anti-Condensation kits are another simple fix for condensation, and most of these DIY kits come with detailed instructions and all the needed materials. To install the liner drain the toilet tank and wipe away leftover moisture. Take the material liner and cut it to the size of your tank. Apply the glue and carefully place the liner inside the tank. Allow it to dry thoroughly before turning the water supply back on and filling the tank.
Tee Time Blues
At the base of the toilet are two bolts that thread up through the floor flange, anchor the toilet and create a seal to prevent waste water from escaping. These are tee bolts. We most often find them covered with decorative dome-like structures to protect them from moisture and prevent corrosion. Loose tee bolts can cause the toilet to wobble or shift with use and ultimately weaken the wax ring seal; a prime example of a toilet leaking from the base.
Tighten the Tee Bolts
To tighten tee bolts, you need a wrench and possibly pliers. Take off the bolt covers and attempt to turn the nuts by hand, if there is not a ton of corrosion this is easy. If you cannot, try gripping the bolts with pliers and turning the nuts with a wrench. Alternate between sides so that you do not tighten one side too much and crack the toilet. Once done, turn the water supply back on and give the toilet a flush to see if tighter bolts resolved the toilet leaking from the base issue.
Replace the Wax Ring
To replace the wax ring you have to remove the toilet. Have all of your materials (including an extra set of hands) on standby. First, make sure that the supply line is off, and then disconnect it from the tank. Make sure all water is out of the toilet —flush and dry out the tank and force excess water from the bowl— and then begin the process of removal. Loosen, or cut the tee bolts and gently rock the commode to break the seal. With help lift the toilet from the floor flange and move it to the side.
Use a putty knife to remove the old wax ring. Clean the area thoroughly, and make sure to remove all wax from the bottom of the commode, flange, and surrounding areas. Gently place the new wax ring into place and press it down. Put the new tee bolts into place and then replace the toilet. Screw the tee bolts down, reconnect the water line, turn on the valve, and flush. No more toilet leaking from the bottom.
Leaks Be Gone!
After you have finished it is a good idea to wash down the area once more with hot sudsy water and disinfectant. This will kill any left-over germs and get rid of potential smells left behind. Properly dispose of supplies used to clean the area, and enjoy your new leak-free water cabin.
If all this sounds a bit scary, Get Professional Help, Call 24 Hour Plumber in Etobicoke, Ontario at +1 866-306-2080.